Efficient cable management is crucial in any industrial or commercial setup. Installing a cable tray system not only helps organize cables but also ensures safety and accessibility. This guide will walk you through the essential steps on how to install a cable tray system effectively.
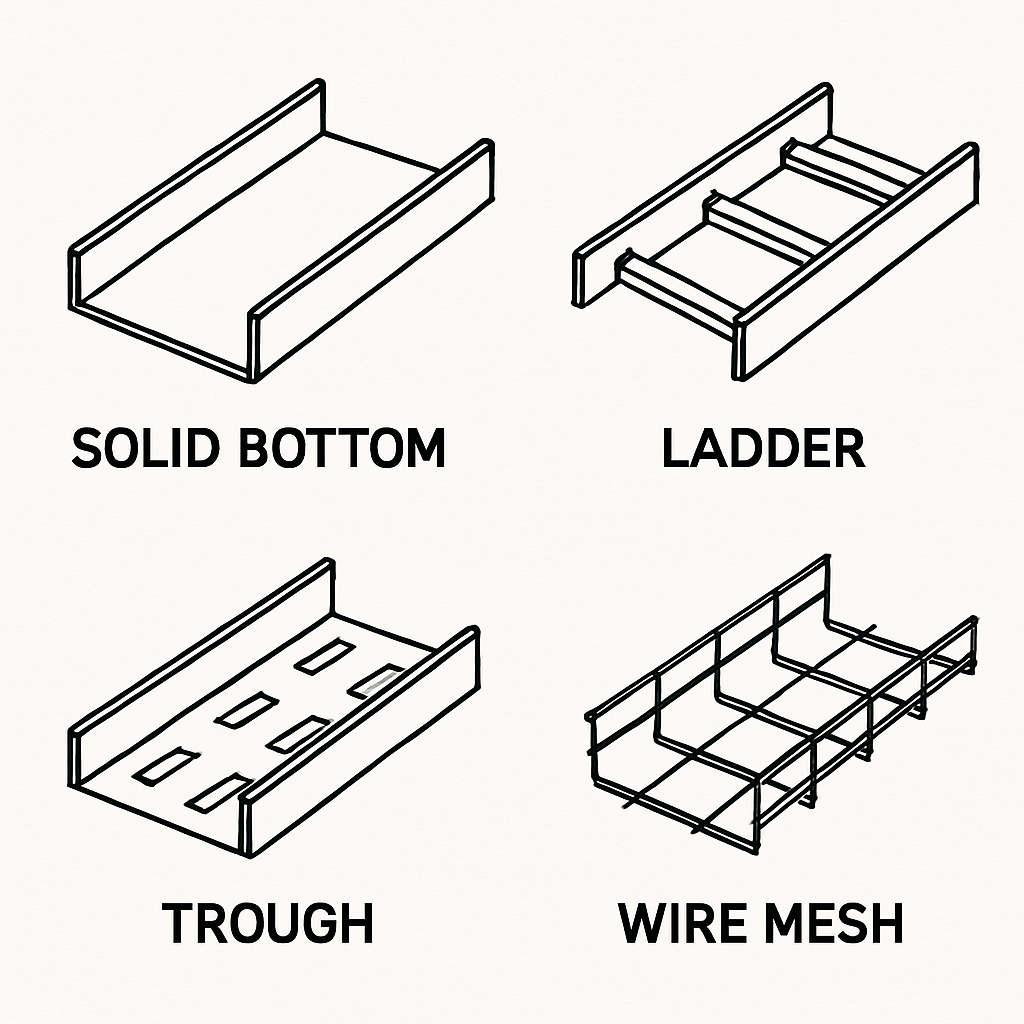
Before diving into the installation process, it’s vital to understand the different types of cable tray systems available. The most common include ladder cable trays and wire mesh trays. Each has its own advantages depending on your specific needs for electrical cable routing.
Planning Your Cable Management System
Assessing the Area
Start by evaluating the area where the cable tray will be installed. Determine the path for cable routing, considering factors like the location of equipment and potential obstacles. A well-thought-out plan is a cornerstone of a successful cable management guide.
Measuring and Material Selection
Next, measure the distance the cable tray will cover. This helps in selecting the right type and amount of tray material, such as ladder cable trays for heavy-duty applications or wire mesh trays for lighter loads. Material selection is crucial for a robust cable tray support system.
Etapas de instalação
Step 1: Gather Tools and Materials
Before starting, ensure you have all necessary tools, including a drill, level, measuring tape, screws, and brackets. Having everything on hand will streamline the cable tray installation process.
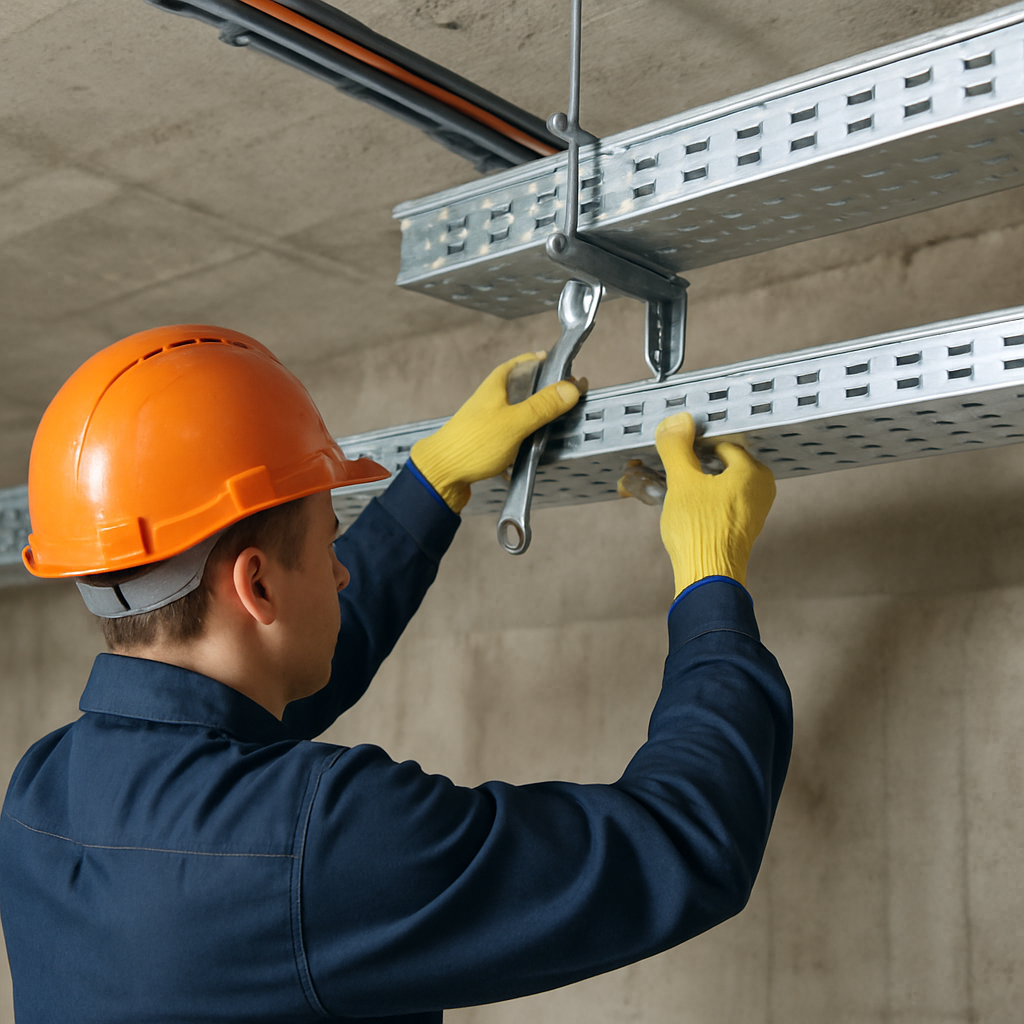
Step 2: Mounting the Support System
Install the cable tray support system, which includes brackets and hangers. These should be securely fixed to the walls or ceiling, depending on your design plan. Ensure they are level and spaced adequately to support the weight of the cables.
Step 3: Installing the Cable Tray
Once the support system is in place, begin installing the cable tray sections. Secure each section using appropriate fasteners. For ladder cable trays, ensure each rung is aligned correctly. For wire mesh trays, check that the mesh is even and flat.
Step 4: Securing the Cables
With the trays installed, route your cables through the tray system. Use cable ties or clamps to secure the cables within the trays, ensuring they are neatly organized and do not sag. Proper cable management reduces the risk of damage and enhances the system’s efficiency.
Step 5: Final Inspection
Conduct a thorough inspection of the entire setup. Check all connections, ensure the trays are secure, and verify that the cables are properly routed. This step is crucial to maintaining a reliable and safe industrial wiring setup.
Conclusão
Installing a cable tray system is a straightforward process when you follow a structured approach. By understanding your needs, planning meticulously, and executing each step carefully, you can create an efficient cable management system. Whether using ladder cable trays or wire mesh trays, a well-installed system ensures better safety and functionality in your industrial or commercial space.
If you have any questions or need further assistance, feel free to reach out or leave a comment below. Happy installing!