Managing cables efficiently is a common challenge in many settings, from offices to healthcare facilities. A cable management tray can be a game-changer, offering a tidy solution to tangled wires and enhancing the overall safety and aesthetics of a space. Below, we explore how to effectively use a cable management tray, particularly in environments that rely heavily on diagnostic and healthcare imaging supplies.
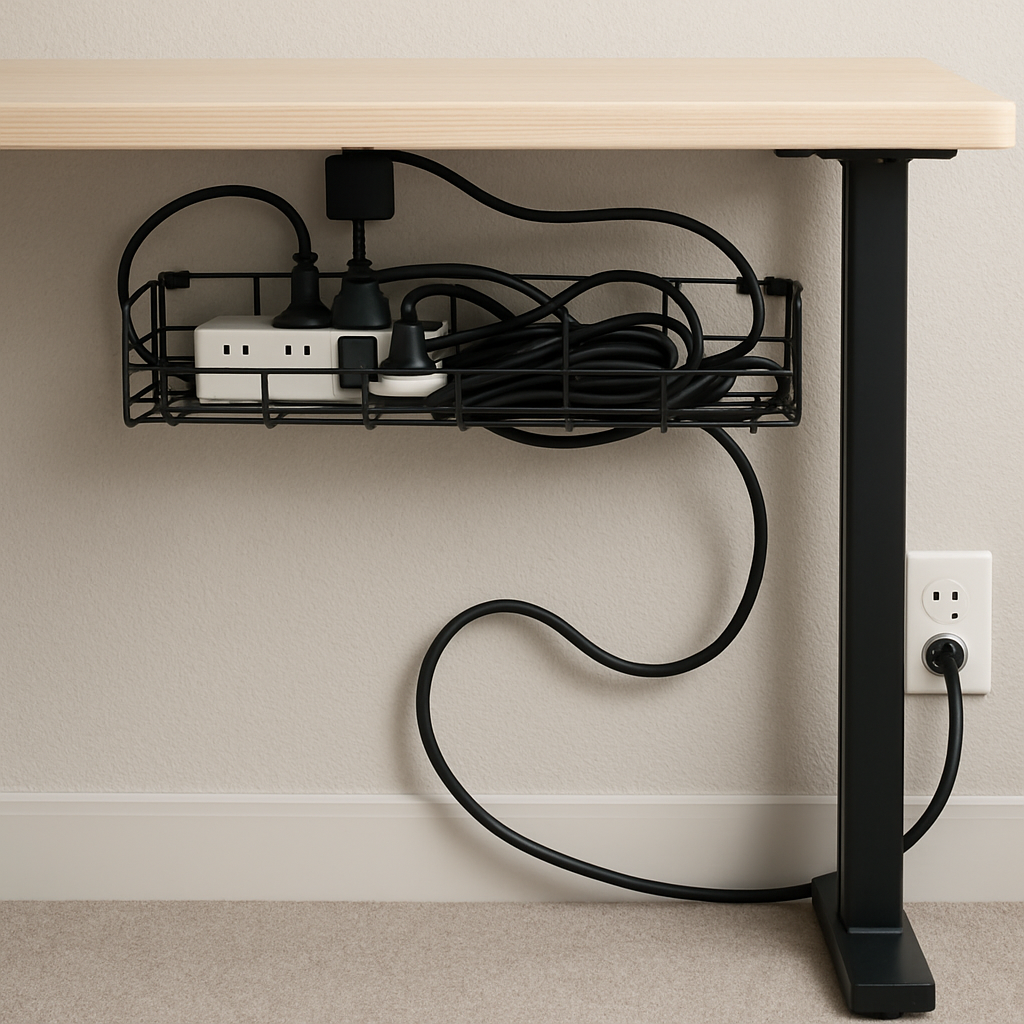
Cable management trays are designed to organize and support cables, preventing them from becoming a tangled mess. These trays are typically mounted under desks or along walls, providing a designated pathway for cables. This not only keeps cables out of sight but also protects them from potential damage.
Benefits in Healthcare Settings
In healthcare environments, where equipment like medical x-ray film, digital x-ray film, and other diagnostic imaging supplies are prevalent, maintaining an organized workspace is crucial. The use of cable management trays ensures that cables associated with radiographic and X-ray medical films are neatly arranged, reducing the risk of interference with sensitive equipment.
Steps to Install a Cable Management Tray
Step 1: Gather Your Supplies
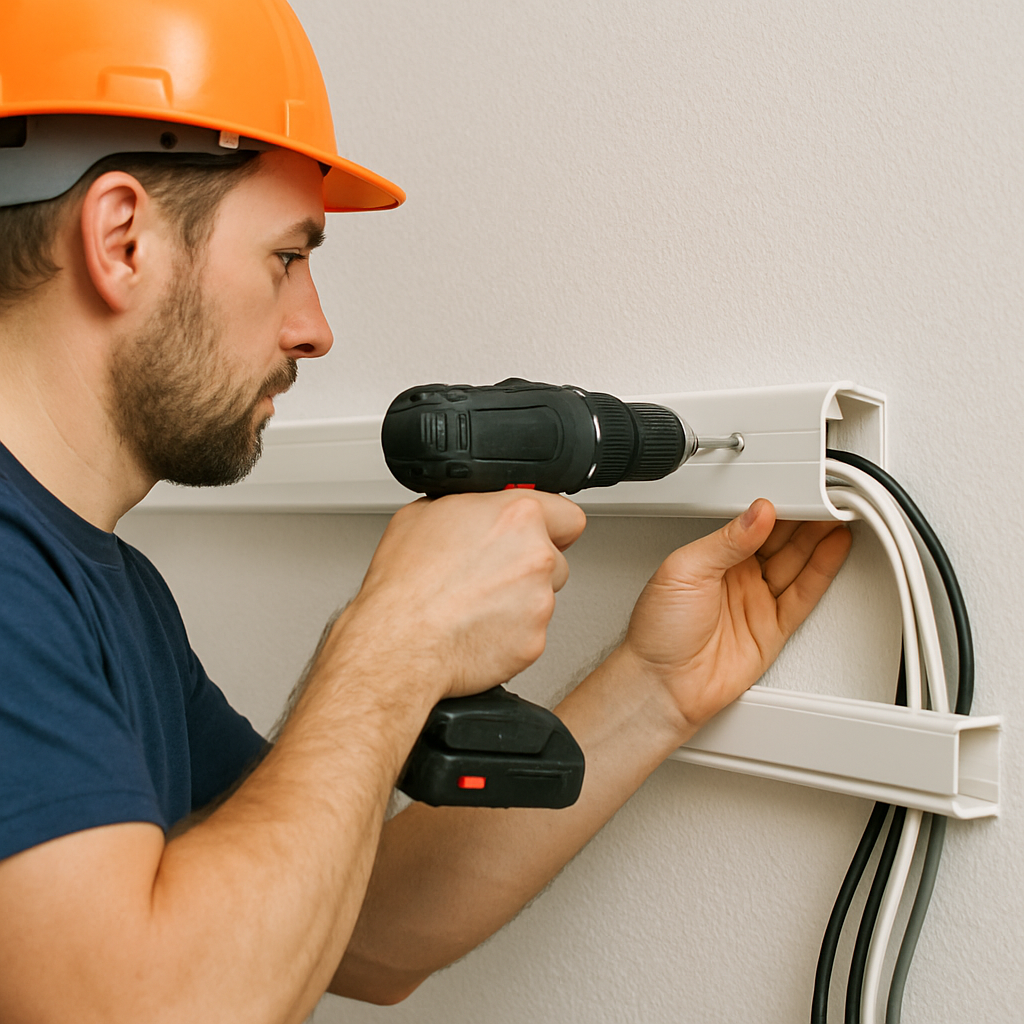
Before you begin, ensure you have all the necessary supplies, including the cable management tray, screws, a drill, and a screwdriver. It’s also helpful to have cable ties or velcro straps to secure individual cables.
Step 2: Plan Your Layout
Consider the location of your devices and the path your cables will take. This planning stage is essential, especially in environments dealing with hospital imaging film and radiology film sheets, where efficient workflow is key.
Step 3: Mount the Tray
Using a drill, securely mount the cable management tray under a desk or along a wall. Ensure that it’s positioned in a way that allows for easy access to the cables but remains discreet.
Step 4: Arrange and Secure Cables
Carefully thread your cables through the tray. Use cable ties or velcro straps to bundle cables that run in the same direction. This not only helps with organization but also makes it easier to identify specific cables when needed.
Step 5: Regular Maintenance
Periodically check your cable management setup to ensure that cables remain secure and organized. This is especially important in medical facilities, where new equipment and diagnostic imaging film may be introduced regularly.
Cable Management Ideas for Improved Efficiency
Consider labeling your cables for quick identification, especially in complex setups involving multiple diagnostic tools. Additionally, integrating a color-coding system can further streamline cable management, making maintenance and troubleshooting more efficient.
By implementing a cable management tray, you can significantly improve the organization and functionality of your workspace. Whether in an office or a medical setting, these trays offer a practical solution to the challenge of managing numerous cables, ensuring a safer and more efficient environment.